

Instagram Grid Planner – Split a Photo into a 3x3, 3x2 or 3x1 Grid
Instagram Grid Planner
Use this free Instagram grid planner to split a photo into a seamless 3x3, 3x2 or 3x1 grid of square posts.
Quick answer
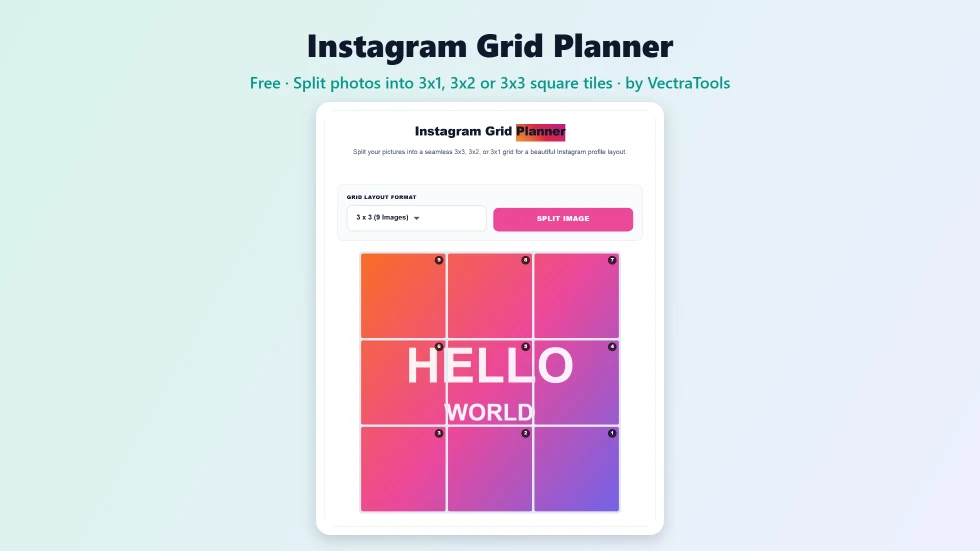
To use this Instagram grid planner, upload a JPG or PNG photo, choose 3 x 3 (9 posts), 3 x 2 (6 posts) or 3 x 1 (3 posts) and press Split Image. The tool centre-crops the photo to the grid shape and cuts it into square 1080×1080 tiles. Each tile is numbered in posting order: post tile 1 first, then 2, 3 and so on. Click a tile to download it, or press Download all tiles.
A giant grid post, where one image spreads across several squares on your profile, is a simple way to make an Instagram feed stand out. Doing it by hand means precise cropping and remembering the right upload order. This free Instagram grid planner does both for you.
I updated the splitter so every tile is a true square at Instagram's recommended 1080×1080 size, even if your photo is wide or tall, and changed the numbers to show the order you should post them in. A Download all tiles button saves the whole set in one go. Everything happens in your browser, so your photos are never uploaded.
Instagram Grid Planner Features
| Feature | How it works |
|---|---|
| Three grid layouts | 3 x 3 (9 posts), 3 x 2 (6 posts) or 3 x 1 (3 posts) |
| Square 1080×1080 tiles | Instagram's recommended size for feed posts |
| Smart centre crop | Any photo shape is trimmed evenly so tiles line up |
| Posting-order numbers | Tile 1 is the one to post first |
| Download one or all | Click a tile, or use Download all tiles |
| Clear file names | Files are named like ig-grid-post-1-of-9.jpg |
| High quality | Tiles are exported as high-quality JPGs |
| Private | Photos are processed locally and never uploaded |
How to Use the Instagram Grid Planner
Step 1: Upload your photo
Click the upload area and choose a JPG or PNG. Use a high-resolution image, ideally at least 3240 pixels wide for a 3-column grid, so each tile stays sharp. Keep the main subject near the centre, because the tool trims the edges to fit the grid.

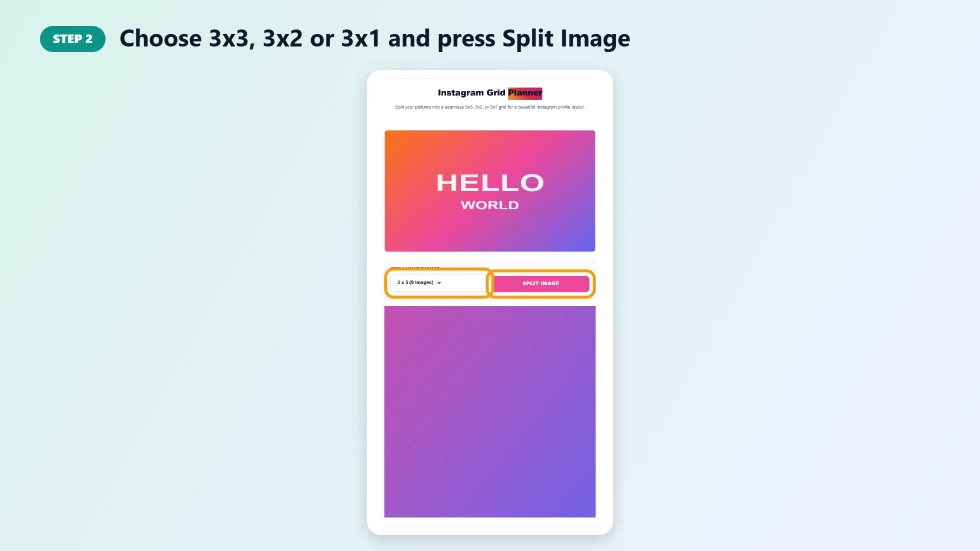
Step 2: Choose 3x3, 3x2 or 3x1 and press Split Image
Pick a layout under Grid Layout Format. 3 x 1 makes a single wide row, 3 x 2 a banner of six posts and 3 x 3 a full nine-post square. Press Split Image to cut the photo into square tiles.
Step 3: Download the tiles and post them in number order
The tiles appear in a preview grid with numbers in the corner. Press Download all tiles or click individual tiles. On Instagram, post tile 1 first, then 2, 3 and so on. Because new posts appear at the top left, the image builds up correctly on your profile.

Why the Posting Order Matters
Instagram always places your newest post in the top-left corner of your profile and pushes older posts to the right and down. To rebuild a split image correctly, the bottom-right tile has to go up first and the top-left tile last. This Instagram grid planner handles that for you: the numbers already show the correct order, so you only need to post 1, 2, 3 in sequence.
Instagram Grid Planner Tips
- Post all tiles in one session so other posts do not break up the image.
- Choose a photo with a bold central subject and simple edges.
- Write captions that link the series, or put the main caption on the last post.
- Check your profile preview: Instagram's profile grid can show posts slightly cropped at the top and bottom, so keep key details away from tile edges.
- Use 3 x 1 for a quick panorama or announcement row.
Ideas for Grid Posts
- Product launches: reveal a new product across six or nine posts.
- Event announcements: a bold three-tile banner with the date.
- Panoramas: landscapes and cityscapes look great as a 3 x 1 row.
- Brand refresh: introduce a new look with one big image.
- Puzzle posts: encourage followers to visit your profile to see the full picture.
Frequently Asked Questions
Is this Instagram grid planner free?
Yes. It is free with no sign-up, no watermark and no app to install.
What size are the tiles?
Every tile is a 1080×1080 pixel square, the size Instagram recommends for feed posts.
In what order should I post the tiles?
Post the tiles in number order, starting with tile 1. The numbers are already arranged so the image appears correctly on your profile.
What if my photo is not the right shape?
The tool centre-crops it to the grid shape automatically, trimming equal amounts from the edges so all tiles are square.
Are my photos uploaded to a server?
No. Splitting happens in your browser, and your photos never leave your device.
Does it work on a phone?
Yes. You can upload from your camera roll and download the tiles straight to your phone, then post them in the Instagram app.